This episode is based on how we like to cut our skins. So if you have new skins or you followed the instructions perfectly you can check this one out.
A workbench with vices is nice for this tip but you can cut skins nearly anywhere. If you have G3 or G3 made skins (Spline, Spark, Burton & backcountry.com) they should have a nice little trim tool included in the bag. If you don't have this tool ask a friend, hopefully they have one. Don't fret if you can't find the tool and exacto knife or sharp swiss army knife will do as well. You'll just have to measure more.
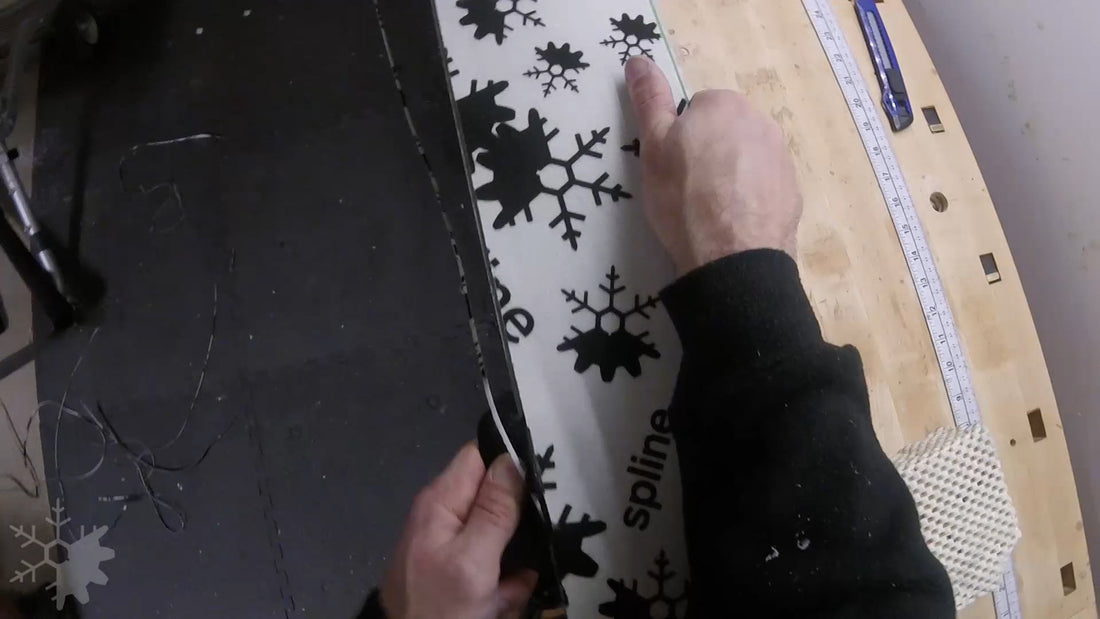
1 - Peel the protective backing off the glue on your skin and install the skin on your board. Running yoru hand nose to tail should feel smooth while going tail to nose should feel rough or sticky. Typically the long rubber tail of the skin is installed on the tail of the board.
2 - Make sure the skin is installed smooth, straight and tight. Take your time and make sure you're happy with these steps prior to cutting!
3 - Using the trim tool, slice booth sides of the skin off. If your using a normal knife, slide the knife right along your edge keeping the knife vertical (90 degrees to the base).
This is the extent of the instructions typically.
4 - Now, remove the skin and stick it back on flush with straight edge. You won't be able to clip the nose or tail on when you do this so you'll want to place it about where it would sit normally. I find a little pen mark on the middle of the skin and edge help line this all up. If using a knife, you'll want to stick the skin down so there's about 4mm of skin overhanging the edge.
5 - Trim the skin again along the straight edge.
6 - Remove the skin and line it up with the edge on the sidecut side of the board. Again, a pen mark on the skin and edge help line everything up. Using a knife, again leave about 4mm of skin overhanging.
7 - Trim that side.
8 - Now you're done with the side trimming. The next steps we'll trim the nose and tail.
9 - Fold the skin perfectly in half. And I mean perfectly. Line up the straight side and get the nose/tail clips lined up nicely.
10 - Using a straight edge and a sharp knife, trim the outside corner of the skin off. This may take a few passes with the knife. Depending on the angle you took, you may need to cutoff the secondary corner you just created.
So why do I like to cut more skin off then recommended you may ask. Couple of reasons.
Splitboards inherently have lots of grip so cutting a few extra mm of won't hurt. Having a slightly narrower skin allows for more wiggle room when installing the skin in the backcountry, meaning you don't have to line it up perfectly when you install the skin. Second, it exposes a little bit more of your metal edge making that a more positive hold. And third it exposes a bit more base which will help your glide on the flats a little bit while not really impacting your uphill grip.
One note of this tip, do not cut off more skin than necessary!! I've cut a few skins way too narrow and slipped onto my face more times than once on them. haha. Over the years, cutting the skin back about 4mm from the edge seems (to me) to be the sweet spot for splitboards.
Steps 9-10 serve to taper the nose of the skin (and match the tail for when you fold them). Cutting this corner off the skin mainly helps keep snow from jamming itself under the skin while breaking trail. Grip comes from near the feet so this has no effect on how the skin climbs. It does drop a little bit of weight, but most importantly keeps your glue from getting wet.
Happy Skinning!